Saturday, March 26, 2016

Beautyzone|Natural Ways to Remove Blackheads on Face and Nose

Natural Ways to Remove Blackheads on Face and Nose

What are Blackheads?

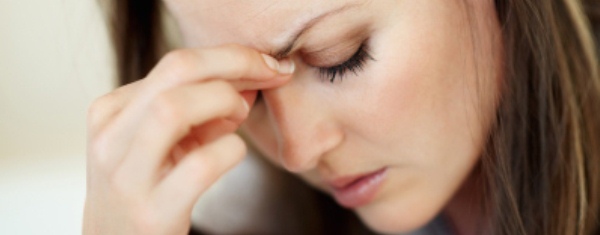
Blackheads, also known as open comedones are tiny, dark spots that appear on the surface of your skin. Blackheads are blocked pores (hair follicles) in the skin that are filled with skin debris or keratin and sebum, an oily substance. Blackheads occur mainly on the face and nose and are a common problem among adolescents especially those with oily skin. Blackheads can be called first stage acne, before bacteria enters the clogged pores.

Common Causes of Blackheads

Here are the main causes that lead to blackheads-

*Stress 

* Hormonal changes
* Inheritance
* Unclean skin
* Cosmetics
* Smoking
* Alcohol
* Caffeine

Natural Tip to clear Blackheads

Follow these simple, natural tips to clean your pores and banish blackheads using easily available ingredients at home.

Tip 1:
TOMATO
 

Tomato have natural antiseptic properties that dry up blackheads. Take a small tomato, peeled and mashed, then apply it over the blackheads before going to bed. Leave overnight and then wash your face with clean water in the morning.


Tip 2:
LEMON

Lemon is another natural ingredient that is effective in treating blackheads. Squeeze few drops of lemon juice in a bowl, add salt and stir the mixture well. Wash your face with warm water and apply the mixture on the blackheads. Leave for some 20 minutes and wash your face again with warm water.


Tip 3:
TOOTHPASTE

Apply a thin layer of toothpaste over the blackheads, leave for 25 minutes and wash your face gently with warm water. Repeat this remedy for two weeks to be free from blackheads.

Tip 4:
HONEY

Honey has antiseptic properties that work wonders for both oily skin and blackheads. Apply honey onto the affected area and wash off with warm water after 15 minutes.


Tip 5:
BAKING SODA

Prepare a mixture of baking soda and water to make a paste. Apply gently to the affected part, allow to dry for few minutes and then rinse it off with warm water to remove away the oil and dirt that causes blackheads.

Tip 6 :
YOGURT

A mixture of oatmeal and yogurt  is good for the skin and helps banish blackheads. Mix 2 tablespoons of oatmeal with 3 tablespoons of yogurt, add 1 tablespoon of lemon juice and olive oil to it, mix all these ingredients well till it forms a paste. Apply the mixture on the face, leave for 10-15 minutes and wash your face with cold water.


Tip 7:
RAW EGG

 Raw eggs are an effective home remedy to get rid of blackheads. Beat one to two egg whites, mixed with one tablespoon of honey. Apply this mixture over the area of blackheads, leave for 30 minutes and wash off with warm water.

Tip 8 :
CINNAMON POWDER
Prepare a mixture of equal parts of cinnamon powder and lime juice to form a thick paste. Apply the paste to the affected parts and leave on overnight and then wash off your face with warm water in the morning.

Tuesday, March 22, 2016

beautyzone|How to Lighten Skin Naturally

How to Lighten Skin Naturally

Dark and dull skin can be caused by overexposure to the sun, environmental pollution, a medical condition, dry skin, stress, poor lifestyle choices, and prolonged use of chemical-based cosmetic products.


Many people work hard to achieve fair and flawless skin. The market is flooded with skin-lightening creams and lotions. But such products have harmful chemicals that can ultimately damage your skin. Oftentimes the products are expensive, too.

You can save yourself some time and money by using natural remedies that will effectively brighten and lighten your skin complexion.

1. Yogurt 

Yogurt, a by-product of milk, has many nutrients that are good for the skin. It also contains lactic acid that has bleaching properties. The following remedies are suitable for all skin types.

  • Gently rub plain yogurt onto your skin. Leave it on for a few minutes and then wash it off with lukewarm water. Do this once daily for several weeks to notice a significant change in your complexion.
  • Alternatively, mix one tablespoon of fresh yogurt with one-half tablespoon of honey. Apply the mixture on your face and neck. Leave it on for 10 to 15 minutes and then wash it off with water. Do this daily to improve your skin tone and complexion.
  • You can also add a little lemon juice and some oatmeal to yogurt to make a thick paste, and apply it

    2. Oranges

    The most important ingredient in skin care is vitamin C, which you can get in abundance from oranges. Plus, oranges have bleaching properties that can lighten your skin tone.
    It has been found that regular consumption of fresh orange juice can greatly improve the overall texture of your skin as well as its suppleness. To lighten your skin, oranges can be used in two different ways.
    as a face mask. This remedy will also help keep your skin supple and moisturized. 
  • Combine two tablespoons of orange juice and a pinch of powdered turmeric. Apply this mixture on your face and neck before going to bed. You can also apply it on your hands and legs. Wash it off after 20 to 30 minutes. Do this daily.
  • Grind dried orange peels into powder. Mix one tablespoon of the powdered peels with one tablespoon of plain yogurt to make a paste. Apply the paste on your skin and leave it on for 15 to 20 minutes. Rinse it off with water. This will help lighten spots and other marks on your face. Do this once or twice a week, but no more than that.

    3. Gram Flour

    Gram flour is one of the best ingredients for people who wish to lighten their skin complexion. It contains various nutrients that help keep your skin very healthy. Using the remedy below every other day will help remove excess oil from your skin while retaining your skin’s natural moisture.
    1. Mix some gram flour with a small amount of water or rose water to make a thick paste.
    2. Apply it on your face, hands, and legs.
    3. Leave it on until the paste dries. Then wash it off with water.

    4. Honey

    Honey helps bleach skin while also acting as a moisturizing agent.Dry skin is a common factor that contributes to an uneven skin tone. Honey also has antibacterial properties that can help fade age spots and acne scars.
  • Apply pure honey to your face, leave it on for a few minutes and then wash it off with lukewarm water. This simple remedy will help remove dead skin cells, making your skin appear brighter and fresher than before. Do this once daily.
  • To make a skin-lightening mask, combine one teaspoon each of honey and lemon juice, one tablespoon of powdered milk, and one-half teaspoon of almond oil. Mix them well and apply it gently on the skin. Leave it on for 10 to15 minutes and then wash it off with cold water. Do this every other day.

5. Lemons

The acidic property in lemons works as a natural bleaching agent for the skin and the high amount of vitamin C in them encourages new cell growth. Also, lemons have antioxidants that are very good for skin complexion.
  • Dip a cotton ball in freshly squeezed lemon juice and apply it directly on your face. You can even rub a cut lemon directly over the affected skin and allow the juice to stick to the skin. Leave it on for at least an hour and then wash your face with water. Do this once daily. This simple remedy will surely lighten your skin complexion and can also prevent the development of scars on your face.
  • Mix three teaspoons of lemon juice and one teaspoon of turmeric powder. Apply this mixture on the skin and leave it on for half an hour. Wash it off with water. Do this once daily.
  • Alternatively, mix together one teaspoon each of lemon juice, powdered milk and honey. Apply it on your skin and leave it on for 15 to 20 minutes before rinsing it off. Do this daily or every other day.
Note: When using these remedies, be sure there are no open wounds on your skin. The acidic nature of lemon juice can cause pain in open wounds. Also, lemon juice may not be suitable for sensitive skin or if you are allergic to lemons.

6. Aloe Vera Gel

Aloe vera can alleviate hyper pigmentation and restore your skin’s original color. Hyper pigmentation is one of the main causes of uneven skin tone.
Also, the cooling effect of aloe vera helps regenerate new cells and rebuild damaged tissue, which is important for healthy skin. This simple remedy using aloe vera gel can lighten dark spots and improve your overall skin complexion.
  1. Cut the outer layers of an aloe vera leaf. Squeeze out the thick, jelly-like substance.
  2. Apply the gel thoroughly on your skin.
  3. Leave it on for about 30 minutes, and then wash it off with water.
  4. Do this at least twice daily for two weeks.
If you do not have an aloe vera plant, you can buy aloe vera gel in the market.

 Follow these natural remedies to lighten your skin complexion. However, bear in mind that these are very effective but will take time and patience to achieve your desired goal. Also remember that healthy skin is as important as a beautiful skin tone. So, try to maintain healthy skin also.

Monday, March 21, 2016

beautyzone|Simple tips to do manicure at home

 Easy And Simple Tips To Do Manicure At Home

When you meet someone for the first time you shake hands. This is why hands are one of the first things people notice about you. In case you do not bother to take care of your nail and hands, then you must start doing it from today onwards. Remember that the first impression about a person goes a long way. So, in order to create a good impression about yourself, you must manicure your hands once in a while.


Most of us think that getting manicure treatments is an expensive deal, but in reality it is nothing like that. No need to take an appointment in the salon for manicure and spend money. You can do a manicure at your home without any assistance.

Believe it or not, doing a manicure at home is a great way to unwind your stress and it makes you feel good about yourself when your hands look. To do manicure at home you can buy a manicure set, and if you do not have one, there is nothing to worry about.

 You can collect the items included in a manicure set and make your own set.

Here are certain things you will need to do manicure at home:

  • A bowl with lukewarm water where you can dip your hands in
  • Cotton balls
  • Paper towels
  • Nail cutter
  • Nail filer
  • Buffer
  • Cuticle remover
  • Nail paint remover
  • Your favorite shade of nail paint
  • A flat board to place your hand on
  • Hand cream or moisturizing cream.
Collect all the things in one place and sit in a room where there is plenty of light.

Here is a step by step way to do manicure at home on your own.

Step 1# Remove the old nail paint:

Before you start with your manicure, you must take off the old nail paint from your finger nails. Use a good quality nail paint remover. Soak a cotton ball with some of the solution of the remover and gently rub it above your finger nails. If the nail paint is too old or there are too many coats of nail paint, it may take some time. Follow this step unless your fingernails are free from old nail paints. While using a remover, make sure that the solutions is used on the nails only and you are not touching the sensitive skin near the nails.

Step 2# Trim your nails:

Next you need to trim and file your nails to a length of choice. If you wish you can keep the length of your nails long or short but go for one in which you are comfortable. First trim the nails with the help of a sharp clipper or scissor. As for shape, you can keep it square or rounded depending upon your preference. Once the nails are cut take a nail filer and start filing your nails in one direction. Start from the edges and gradually move towards the top and you must not file your nails back and forth. Finally with the help of a soft buffer you need to make the surface of each nail smooth. Be careful because too much buffing with weaken your nails.

Step 3# Soak your hands:

Next you need to soak your hands in a bowl of soapy lukewarm water for around five to seven minutes. In the water, you can put a moisturizing soap or a tablespoon of your favorite liquid soap. This will help in making the cuticles soft and loosen up the dirt below your finger nails. Never use too hot water as it will dry out your hands and nails and also do not soak your hands for too long time. Once you soak your hands you will feel your fingers relaxed and your hands will feel comfortable. Finally wash your hands in fresh water and pat fry it using a soft towel or paper tissue.

Step 4# Remove cuticles:

Now apply good quality cuticle oil or moisturizing lotion on your hands thoroughly. If you do not have cuticle oil you can use olive oil also. This will help in nourishing and softening rough spots. Now take a cuticle remover and push back the cuticles one at a time so that it loosens up. Trim excess skin with the help of a cuticle nipper. Be sure not to cut your cuticles, which can cause infection and damage the nail. Do not put too much pressure as it can cause bleeding.

Step 5# Scrub your hands:

Now if you wish you can scrub your hands. This step is no mandatory and so if you do not have much time you can surely skip this step. Scrubbing will improve the blood circulation of your hands. To scrub your hands you can use your regular body scrub or else you can prepare a homemade scrub by mixing olive oil and salt or raw sugar together. You need to scrub your hands only for two to three minutes only. Too much scrubbing is not recommended. Do not scrub your fingers as it will remove the shine of your nails. Finally wash your hands and fingers thoroughly with fresh water and pat dry using a soft towel.

Step 6# Apply moisturizer:

Next apply some rich moisturizer on your hands. You can use any of your favorite moisturizer. Make sure the moisturizer is applied properly on your hands and cuticles. Gently massage your hands for a few minutes and you will enjoy the relaxing feeling on your hands. Finally you need to wipe away the excess cream or oil left on your hands or fingers with the help of a cotton cloth. While removing the moisturizer, you must avoid the cuticle area as this is one area which you need to keep well moisturized.

Step 7# Apply nail paint:

First apply a base coat on your finger nails and allow it to dry properly for one to two minutes. Then apply one thin coat of your favorite shade of nail paint. Always apply nail paint by starting on the side of the nail. Try to cover the nail in three even stokes, one on each side and one in the middle. After the first coat dries apply the next coat for more shine. Finish it with a top coat. Do not touch anything before your nails get completely dried. If you have the habit of habit of putting nail paints you can skip this step. After doing the manicure at home you can put nail paint after two or three days.

Important points:

  • Never use very hot water to immerse your hands in it as the heat can cause skin dryness.
  • Never use a tissue paper to remove your old nail paint as it will not absorb the remover properly and you will find it difficult to use.
  • Always use a brush having soft bristles as a hard brush can hamper the natural shine of your fingernails.
  • Never keep chipped nail paints for too long as it looks ugly.
  • At time you must keep your fingernails free of nail paint  to allow the nails to breath.
  • Keep your nail paints in a cool and dry place to increase their longevity.
  • Do not dry your nail paints using a blow dryer as the heat will cause the nail paint to expand.

You Might also want to try this Easy Homemade Manicure Scrub:

Recipe for Manicure Scrub:

  1. Take 3 teaspoon sugar.
  2. Mix 1 teaspoon olive oil in it.
  3. Now wet your hands.
  4. Apply this scrub on your hands and around the nails.
  5. Massage them well for about minutes in a  circular movement.
  6. Leave for 2-3 minutes.
  7. Rinse everything away with lukewarm water and pat dry with a clean towel.

Final Words:

With the above mentioned tips you can get a manicure right at the comfort of your home. Now there is no need to go to salon and spend money on manicure when you can easily do it at home and that too without spending too much money. Do a manicure once a week to maintain the looks of your hands.


Sunday, March 20, 2016

beautyzone|Easy Remedies To Remove Sun Tan From Face

Home Remedies to Remove Sun Tan from Face

 Tanning makes your skin appear darker and discolored.It occurs when the skin gets exposed to harsh UVA
rays that penetrate to the lower layers of the epidermis and causes the skin to produce more melanin and thus leads to darkening.


 Melanin is a pigment that is responsible for the color of your skin.The more melanin the melanocytes produce the darker the skin appears.So, here are few natural remedies that you must try to remove those unpleasant sun tan, to reduce melanin and to lighten the skin complexion naturally.Here are some quick ways to Remove Sun Tan from Face & neck

Best Home Remedies to Remove Sun Tan from Face and Neck

1.Milk, Rice Powder and Honey Bleach –

 Mix 2 tsp of rice powder, 2 tbsp of cold milk and 1 tsp of honey into a fine paste.Clean your face and neck thoroughly and then apply.After 20 minutes, lightly scrub using your wet hands and then wash off with cool water.This pack acts like a natural skin lightening bleach cream.It fades away tan, eliminates dead skin cells and leaves your skin silky, smooth and fair.

 2.Potato juice and Yogurt – 

 Potatoes are most commonly known for their ability to lighten skin.It contains catecholase, an enzyme that treats spotted hyperpigmentation and discoloration caused by sun exposure and helps lightening your skin tone.Take a peeled potato and cut into slices or cubes.Grind this potato slices together with 2 tbsp of yogurt.Apply this freshly prepared paste on your face and neck, wash off after 15 minutes.It remove sun tan quickly and brightens skin color.

 3.Sandalwood Powder and Rose water –

 Sandalwood has a cooling effect on the skin.The antibacterial and anti-inflammatory properties of sandalwood instantly calms down reddened or inflamed skin, sun rashes and eliminates tan.Mix 2 tbsp of sandalwood powder with enough rose water for a smooth consistency.Freeze it for 10 minutes and then apply this cold sandalwood paste.

 4.Cucumber and Lemon juice –

 Another effective way to get rid of sun tan quickly to apply a fresh paste of cold cucumber juice mixed with 2 tsp of lemon juice and then wash off after 10 minutes.Lemon juice is a great treatment for the tanned skin due to its natural skin bleaching properties and cucumber has an anti-inflammatory and cooling properties that instantly soothes sunburn skin.

5.Chilled Yogurt and Mint juice 


 It’s a simplest way to remove tan from your face and neck.Mix 3 tbsp of chilled yogurt with 2 tbsp of mint juice and with a cotton pad dab it on the affected area.Let it sit for 10 minutes and then wash off with cool water.Yogurt’s lactic acid lightens skin tan and reduces pigmentation.Mint juice soothes inflammation and eases sun rash and sun burnt skin.

6.Aloe Vera and Rose water –


Remove sun tan with aloe vera. Fresh aloe vera gel is the magic cure for tanned skin.It is extremely powerful in minerals, vitamins, enzymes and nutrients that work effectively to treat different skin problems like rashes, sunburn, and skin discoloration.Combine 2 tsp of aloe vera gel with few drops of rose water.Freeze it for 10 minutes and then soak it up into your tanned skin.

 7.Oats and Honey Exfoliating Scrub –

 Make your own homemade anti-tan exfoliating creamy scrub.Take 2 tbsp of oats powder, add 1 tbsp of cold water and 2 tsp of honey.Mix it well and exfoliate your face and neck for 2 minutes and then wash off with cool water.This scrub works wonders, it gently exfoliates rough, sun-damaged cells and adds glow to your skin.

Friday, March 18, 2016

beautyzone|5 Instant Orange Peel Dry Powder Face Packs

5 Instant Homemade Face Packs Using Orange Peel Dry Powder

Orange is the delicious juicy fruit that has many health as well as beauty benefits. You can relish your taste buds with oranges alongside keeping a clear glowing skin. To get the most out of oranges all you need to do is collect their peels to make a dry powder. Even when oranges are out of season this dry orange peel powder complements its beauty benefits. As it is a dry powder so it can be stocked for 3-4 months in an air tight jar.

Being a citrus fruit Orange is abundantly rich in Vitamin C. This is one of the essential skin Vitamins as it slows ageing, removes tan and improves skin tone. Using orange peels, you can make various face packs that can also be used for mild exfoliation. These face packs/scrubs are very natural, devoid of all the chemicals and are rarely prone to cause skin irritations. So what are you waiting for, let’s start working on these instant face packs to get the most coveted skin


How to make orange peel powder

This is a one time job that will help in formulating various skin cures, and the result will last for a long time.
– Taken half dozen oranges and eat them :-) .
– Collect the peels and keep them in a wide tray.
– Dry the peels under sun for 3-4 days.
– Intermittently, keep shuffling them to get rid of the moisture.
– Once the peels are completely dried (they become crisp and break easily) crush them into small pieces.
– Grind the peels until they convert into a granular powder.
– Store the powder in an air tight container for prolonged survival.


Face Pack 1 

Ingredients required – 

1) Orange peel powder
2) Sandalwood powder
3) Rose water

Mix a spoon of sandalwood powder, a spoon of orange peel powder and 3-4 spoons of rose water. Mix them well, and apply on face and neck. Rinse with cold water when the pack gets semi dry. This pack thoroughly cleans the skin and makes it glow.

Face Pack 2 

Ingredients required –
1) Orange peel powder
2) Organic Honey
3) Lemon juice
4) Turmeric

Add one and a half spoon of honey to a spoon of orange powder and a few drops of lemon. Add a pinch of turmeric; I prefer to use raw turmeric. If your skin is dry then you can skip off lemon. Apply the pack on your face and neck for 15-20 minutes. Rinse with cold water. When used over a period of time this pack removes sun tan.

Face Pack 3 

Ingredients required –
1) Orange peel powder
2) Green lentils powder
5) Almond oil

Grind a spoon of green gram to make fine powder. Mix it with a spoon of orange powder and a spoon of almond oil. Massage your face for a minute, and rinse with warm water.This works as a mild scrub that can exfoliate the skin naturally. Use it once or twice a week for naturally glowing skin.


Face Pack 4 

Ingredients required –
1) Orange peel powder
2) Chilled yoghurt or curd

Add a spoon of yoghurt to a spoon of orange peel powder. Mix it well and apply on your face for 15-20 minutes. Rinse with cold water. If your skin is oily then you can also add few drops of lemon juice.This face pack removes sun tan and cures acne.

Face Pack 5 

 Ingredients required – 

1) Orange peel powder
2) Milk or milk cream
3) Rose water

Add a couple of spoons of milk to orange powder and rose water. Mix them well to get a wearable consistency. Apply this mixture and massage your face for a minute or so. Rinse with cold water. This serves as a good homemade skin cleanser. With consistent use it removes blackheads and dead skin cells from the skin, and slows down ageing.

Depending upon the results, these packs can be used every alternate day or twice a week. Sometimes when I apply these packs I feel a stinging sensation that calms down in a couple of minutes. Otherwise, I do not see any side effects or harmful effects of these homemade face packs. In fact with regular use my skin has become clearer, softer and even.


Sunday, March 13, 2016

beautyzone|5 Skincare Tips That Every Man Should Follow

5 easy skincare tips that every man should follow


Men too have their share of ‘beauty woes’. Daily cleansing and shaving can take a toll on their facial skin. Regular use of moisturizer is one way to regain the softness, says an expert. Dr Navin Taneja, director of the National Skin Center, suggests how to keep men’s skin soft.

 Hot water and long showers remove oils from your skin so, limit your shower time and use lukewarm water to bathe.

 Use mild cleansers to avoid dryness. Strong soaps can rip off the moisture from your skin and make it dry and rough. Since you use them daily, it can affect the skin in the long run. These days, there are special shower gels for men which you can opt for. You can even choose one depending on your skin type like sensitive, oily, etc.


 To protect and lubricate your skin, apply cream, lotion or gel before shaving. Use a clean and sharp razor. If your skin is too itchy or dry, it can lead to cuts. Also, if you find your face itchy even after the shave, apply a moisturizer or lotion to soothe it

 Find a moisturizer that suits your skin type and makes your skin feel soft. There are various brands available in the market these days. If your skin is too dry, opt for a heavier lotion which is more creamy in base. If your skin is more oily, choose an oil-free moisturizer to keep it hydrated. For normal skin, choose an everyday lotion which is not too heavy but adds a layer of protection on your skin.

 If you can’t find time to moisturize your skin, after bathing, gently pat your skin dry with a towel so that some moisture is retained in it.

Saturday, March 12, 2016

beautyzone|Benefits Of Beetroot Juice For Perfect Glowing Skin

10 Best Beauty Benefits Of Beetroot Juice For Perfect Glowing Skin

 Beetroot is commonly consumed by making its juice or in raw form such as salad. Beetroot juice is naturally strong, sweet and has several beauty and health benefits. To enhance the taste and benefits of beetroot juice, you can also add carrot to it. Here are tips to use beetroot juice to get perfect glowing skin.


 Beauty is always the secret behind the attitude that serves as the ultimate way to achieve the winning position. Let’s see how beetroot can help us to achieve that ageless beauty that you secretly always dream of. Do check yourself for any allergy or side effects by taking small quantity of juice initially. You can also dilute the beetroot juice with water or with other fruit juice to avoid any side effect.

 Beetroot juice gives acne and pimple free skin

Beetroot is rich in skin enhancing nutrients and very effective for oily and acne prone skin. Drinking beetroot juice regularly helps prevent acne and pimples from popping up on the face as beetroot has anti-inflammatory properties.
If you do not like the strong taste of beetroot, you can add cucumber, orange or carrot juice to your beetroot juice recipe.
If you are fed up of those scars that acne usually leaves behind, well, try applying beetroot juice and curd in 2:1 tablespoon proportion and acne will dry up in no time and no scar!

Beetroot and glowing skin


Beetroot juice being a rich source of iron, vitamins and minerals can give you healthy and glowing skin. If inner body is healthy, it is sure to reflect on the outside. Drinking a glass of beetroot juice regularly helps cleanse the body of toxins. It purifies blood, and lead to a healthy glowing skin.
Also, applying this juice on face keeps it soft and supple just as a flower petal is! The radiant glow on the face is basically because beetroot helps remove the dead cells and replaces them with new ones.

Skin lightening and fair skin with beetroot

Dream of getting that fair complexion but scared to try the harmful chemically induced beauty products that the market offers? Well, beetroot is your safe bet then! Drinking the juice regularly and applying 1 tbsp of beetroot juice mixed with 1 tsp of lemon juice for 15 minutes before washing it off at night before you go to bed will work wonders towards lightening your skin complexion.
  
Blemishes and dark spots free skin 


 Yes, beetroot works amazingly well to remove any dark spots or blemishes from the skin. Just mix it with little tomato juice and apply it on the spots. Alternatively, go ahead and mix up a little beetroot juice with your regular clay mask and see the positive result on those blemishes. They will disappear in no time with routine application. Beetroot is a natural blood purifier, so also treat the cause from inside the body.

Goodbye dark circles

Stress at work or home, insufficient sleeping hours can lead to dark circles and puffy eyes. Regularly applying beetroot juice helps lighten up the dark circles and the puffy eyes. You will feel a lot of relief with the soothing agents present in beetroot juice.

Natural soft lips and pinkish skin


Lovely pink, soft lips and a beautifully blushing skin can be achieved as simple as just applying beetroot juice. Yes, you heard it right, go ahead and apply beetroot juice generously to your lips every night before going to bed. And within a few days you will have luscious pink lips!
A natural blush on the skin is very much possible too by using beetroot juice. Mix it up with equal proportion of carrot juice and apply it all over your face once a day regularly. There you have it, a naturally blushing skin! Drinking half a glass of
 beetroot juice daily will help you to get beautiful, pink skin and soft, supple lips.

Beetroot moisturizes dry skin

Dry skin can be very frustrating, especially when it tests your patience in the winter months. Everyone knows the good properties of milk and honey on skin. But try this one extra step and get quicker results and beautifully moisturized facial skin. Mix a little bit of beetroot juice with honey and milk and apply it as a nice coating. Dry skin problem solved just like that!

Remove dark lines from neck

Most people tend to neglect those dark lines or patches around the neck area. You work so hard to maintain a beautiful face, so why neglect the neck? Once again, beetroot juice comes to your rescue here! Just apply some of it and massage gently for a few minutes on the neck area (That’s a great excuse to relieve those stressed out neck muscles too, isn’t it!). Or, be a little creative, freeze the juice in your ice tray and use those ice cubes to massage the neck area! That simple!

Wrinkle free and ageless skin with beetroot juice

Once you cross over to the 30s, you start worrying about premature ageing and wrinkles. The antioxidants in beetroot help prevent premature ageing. So, drink beetroot juice regularly. Also, it helps maintain the elasticity in skin and hence prevents appearances of wrinkles.
For those who are in 40s or over 40, and looking for a natural way to get rid of those ugly wrinkles, then beetroot juice is your answer. Just apply a nice and thick coat once or twice a week consistently and you will be a step closer to wrinkle free skin every day.

Get beautiful hair with beetroot juice

Beetroot improves the overall health of hair by maintaining its shine and glow. Why leave behind the hair, when looking for a naturally beautiful you! Yes, with the use of beetroot you can improve the quality of your hair immensely. It helps prevent dry scalp, hair loss and helps get voluminous and shiny hair. Mix some ginger juice with beetroot juice to avoid loss of hair. Add some vinegar with the beetroot juice, and your dry scalp problem taken care of!
 
Besides having innumerable beauty benefits of drinking beetroot juice, it also has a number of health uses such as beetroot is a powerful antioxidant, it helps improves metabolism, has anti-cancer properties, improves liver functions, helps in weight loss and so many more. You can easily try beetroot at home to get rid of certain skin problems naturally.

Tuesday, March 8, 2016

beautyzone|Homemade Nail Polish Remover

Natural and Homemade Nail Polish Remover


What is the most eco -friendly way to remove nail polish? Learn about natural ways to get rid of nail polish with these tips and recipes.
Conventional nail polish removers made with acetone and other dangerous chemicals make the simple task of washing away those bright reds, soft peaches, and radiant pinks a rather toxic affair. Inhalation especially can be dangerous. Are there natural ways to get rid of nail polish?

Nail Polish from Your Nails


Many people don't like to use store bought nail polish removers; they can be too harsh on delicate nails and chemical-based removers are not eco-friendly. Instead, many prefer to remove nail polish naturally to reduce chemical exposure to the nails and finger tips, and to keep nails strong. Here are simple recipes to help you remove nail polish from your nails naturally. Use these easy recipes the next time you want to change your nail color or return to the natural, colorless look.

 Recipe 1: Nail polish

 One way to remove old nail polish is to apply a new coat of polish. Buy clear polish and put a thick coat on each nail one at a time. After applying the coat, wipe immediately. Do not let it dry. This should remove the old nail polish off the nail as well. It's quick, easy and cheap, since a bottle of clear nail polish costs around 99 cents. Additionally, you are not putting anything foreign on your nails.

 Recipe 2: Rubbing Alcohol


Rubbing alcohol is a natural substance. It is a denatured alcohol solution, which is composed of 97.5 to 100 percent ethanol or ethyl alcohol. Rubbing alcohol should only be used topically. Women use it frequently to swab their piercings to keep from collecting bacteria and causing infection. It can also be used to remove nail polish. Simply buy a cheap bottle of rubbing alcohol. You can buy a miniature bottle for under $1. Put rubbing alcohol on a cotton ball and rub away at each nail. It may take longer to remove all the polish than normal remover, but it works just as well.
 Recipe 3: Hot Water

A great way to remove polish is to soften it. Even though we take a hot shower, for example, the polish doesn't become soft. That's because we have to immerse our nails in hot water. Simply heat water on the stove or in a microwave. Test the temperature. You have to be able to tolerate the heat. Then immerse your hands in the bowl of hot water for 15 minutes. After the polish softens, gently scrape off.
 Recipe 4: Vinegar and Citric Fruits

Vinegar is a natural substance. Putting this acidic substance on polish will break it down and make it possible to wipe off. Simply put a small amount of vinegar in a bowl. Add citric fruit such as lemon, lime or an orange, and mix in with the vinegar. Put a cotton ball in the mixture and wipe on your fingernails. It may take a bit longer to remove the polish fully, since it will take a little while to break down. Also, you may have to gently scrape your nails to fully remove.
Insect repellent is sometimes recommended as an alternative nail polish remover. Because of the harsh chemicals found in insect repellent, this is not suggested.
Now that you've learned natural ways to get rid of nail polish, go paint your nails and try it for yourself.